I'm so sorry I've been gone for a while! Its been pretty busy around here lately. But I'm continually inspired by things I see everyone doing. So last week I saw where the very talented Shanty2Chic ladies made a cool memo board. I was immediatly drawn to this project because I had all of these materials just laying around begging to be used, too!
So I started with 3 scraps of 2x4's. I cut mine 12" each (a BIG thank you to my brother in law's father for the amazing eletric miter saw!)
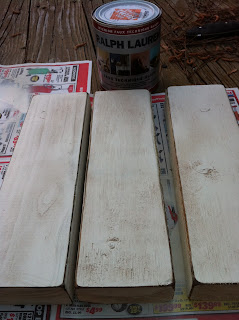
I painted them Heirloom White, then sanded the corners and edges. I went around the edges with some distressing ink, then painted over it with Ralph Lauren Glaze. The first board in the picture doesn't have glaze on it... just so you can see the difference. ;)
Next, I glued the boards together. I had a metal decorative board I had picked up at The Dollar Tree (if you look back at some of my earlier posts, you can see some other ways I've used these). I used a spray adhesive to cover the metal board with scrapbooking paper. I went around the edge with the same distressing ink.
I had some flat bottomed glass pebbles. I sprayed the bottom with adhesive and stuck them to the scrap paper. Then I just cut around the edges.
My poor E6000 has seen better days! Once I got it going, I glued magnets to the backs.
It can be used vertically or horizontally. Now I have to decide if I want to stand it or hang it on a wall. After looking at it both ways, what do you think?
*Everything used for this project was stuff I already had. SO... Final cost: $0


I'm inspired!
ReplyDeleteDefinitely inspired! So stinkin' cute!
ReplyDeleteExcellent! $0
ReplyDelete